Tuesday, January 29, 2013

Sweet 13:Mary Kay Party

This weekend we celebrated Big Sisters Sweet 13.  I am beyond disbelief that I am now a Mom to a TEENAGER!!  13 years have gone by like a blink of an eye.  I can still picture her running around the same size as Little Sister.  We had a FUN weekend, my Mom flew in from out of town and we had a house full of girls to celebrate the special day. 
On her birthday morning she opened her presents and lots of cards from family.  Photo albums, infinity scarf, make-up, Growing-Up Girl figurine were just a few of her gifts.
I've been wanting to buy her charm bracelet for several years but I wanted to wait for this special birthday!  We bought her a James Avery charm bracelet, I had one when I was a teenager too.  It's so fun to build your bracelet with special memories.   
 Big Sis picked out the colors and I made all the decorations and treats for the party. 
I had originally planned to purchase a party set off Etsy but decided to try to  make my own.  {I'll be sharing a tutorial on how to make your own custom printables soon} 
I love the Mason Jar drinks all over so I bought some and made my own of those as well.  I cut circles out of card stock out and used some cute bakers twine I found at Michaels.  That's also where I found the matching straws.   Pink Lemonade in these were super cute and fun drinks for the girls!
 I made a bunch of tissue paper pom pom's and this birthday banner. 
We had family pictures in these black frames in the dining room, but for the party I switched them out with ones of Big Sis as she has grown.  Going through all her pictures was such a bittersweet trip down memory lane for me. 
 The girls loved the cake pops and cupcakes. 
{My Mom and I at the party}
The party was all about MAKE-UP!  The past couple of months Big Sis has become more and more interested in make-up.  I wanted her to learn all about skin care and proper make-up application so we had a Mary Kay Consultant come over and teach the girls.  They had so much fun learning and playing with the make-up.  They all looked beautiful, both with and without the make-up. 
  The Party favors were these adorable terry cloth make-up bags that I found at Target on clearance! Normally $13.99 a bag, but I got them for $3.99....SCORE!
I also embroidered wash cloths for the girls. 
Here is Big Sis before and after the party, such a beautiful girl both inside and out.
Happy Birthday to our Beautiful Baby Girl...I mean Teenager!! 
We had a fun day celebrating YOU :)
{See where I party and link up here} 
RibbonIconFacebook-3RibbonIconTwitter-2RibbonIconPinterestRibbonIconInstagramRibbonIconEmail


Thursday, January 24, 2013

DIY: Custom Printables

Today I'll be walking you through how to make your own custom printables.  Many of us are familiar with the popular Picmonkey for photo editing but I recently found Ipiccy.  Ipiccy basically does the same as Picmonkey but personally I like the fonts much better than the free fonts found on Picmonkey.  I have been using Ipiccy to edit my photos and watermark my pictures recently.  You can also use it to make your own printables by following these steps:

1.  Go to ipiccy.com and click on the orange button labeled "Start Editing"
2.  Next click on upload photo (This is where you would load a background for your printable.  For example: I recently made this Valentines Printable for my Mini Mantel Series, I googled "free gray chevron pattern", saved it to my computer and uploaded the picture.  
3.  Now is the fun part, you can customize your printable with whatever texts and fonts you choose. Add text by clicking on the "blend" button, it looks like this.  
Then have fun picking out your fonts and arranging them just how you like them :)
Save your new creation and share on your blog for all of your wonderful followers!
Big Sisters 13th birthday is this weekend so I've been make some fun printables for her party.  I'll be sharing a tutorial and the printables with you soon!  


RibbonIconFacebook-3RibbonIconTwitter-2RibbonIconPinterestRibbonIconInstagramRibbonIconEmail


Monday, January 21, 2013

Day in the Life:Gymnastics and First Dentist Trip


Middle Sis just completed her second session of gymnastics class.  We aren't allowed to take pictures during their classes otherwise I would share some of the things she has been working on.  This is her and her teacher after the awards ceremony.  We just signed up for her third session.  

Little Sis had her first trip to the Dentist office.  She watched Mommy get her teeth cleaned and examined and then it was her turn.  I was a little nervous about her behaving while I was having my turn but she did really well.  When it was her turn the Hygienist asked her if she wanted to sit on my lap or by herself and she replied "Mommy, get up".  She was a big girl and sat in the chair all by herself and cooperated very well for a 2.5 year old.  The two hygienists and the Dentist were very pleased with her behavior.  Great first trip to the Dentist little one.  You're such a big girl!


Friday, January 18, 2013

Valentine Mini Mantel

 I debated about spending time on making a Valentine mantel because I'm busy getting things ready for my daughters 13th birthday next weekend.  Once I saw all the really adorable decorations all over blog land I just couldn't resist!
I found some heart and circle shaped doilies that I had packed away with all of my scrapbooking supplies.  I sewed them together in no time and they are so adorable on the mantel for Valentines.  Super easy and super cheap!
I was searching for a free printable all over but nothing spoke to me.  I decided it's high time I start making my own printables so I can share them with Happy House of 5's followers!  

{Right-click on the image above to save it to your computer and print. 
In return would you be so kind and become a follower of my blog or "like" my facebook page}
I love decorating our house with God's word and how perfect on Valentines to display one of God's biggest commands, to love one another!  He shows us such perfect love and in return we are to give love to others.  
I'll be back soon to show you how I made this printable for FREE!

I'm linking up here, in addition to my BLOG LOVES
Dollar tree Valentines party

RibbonIconFacebook-3RibbonIconTwitter-2RibbonIconPinterestRibbonIconInstagramRibbonIconEmail


Monday, January 14, 2013

Our last day at Magic Kingdom

It came and went by so fast.  I dreamed of taking our girls to Disney for years and now it's all a wonderful memory.  In the past, all of our vacations have been spent visiting family or them visiting us.  We love our time with family but we decided that we needed our own family vacation memories too.
 It's not easy sleeping as a family of five in one hotel room, or trying to keep a 2.5 year old in a waiting line for over an hour, or dealing with her tantrums because she is overly tired due to no naps for the past two and a half days.....but I am counting my blessings that we were able to go on this trip, and she really was pretty good considering!  We are truly blessed to take such a fabulous vacation with our girls and I thank our family and God who made it possible.  
On our last day we checked out a few more rides that we didn't get to the first day.  The big girls and I went straight to Space Mountain, we waited for an hour and a half for the girls first ever roller coaster ride. Middle Sis LOVED it and Big Sis almost got sick.  Poor thing was very pale when we got off but was ok after getting some fresh air.  I hadn't been on a roller coaster for a long time but loved most of it.  
While the girls and I were doing that Daddy took Little Sis to see Princess Ariel for pictures and a ride.  He also took Middle Sis, later on in the afternoon, for another roller coaster ride just the two of them.  He said it was special because he got to take each daughter on a ride just the two of them.  What a great Daddy!

It's a Small World, a definite classic!  Little Sis loved it.

Today we saw Minnie Mouse, Daisy Duck, Goofy and Donald Duck.
 Daddy wanted a picture himself with Goofy.....go figure ;)

One of Daddy's favorite rides is the Steam Engine, He remembers going on it over and over again when he was a little boy at Disney.  


Wednesday, January 9, 2013

Easy Baby Quilts for Beginners


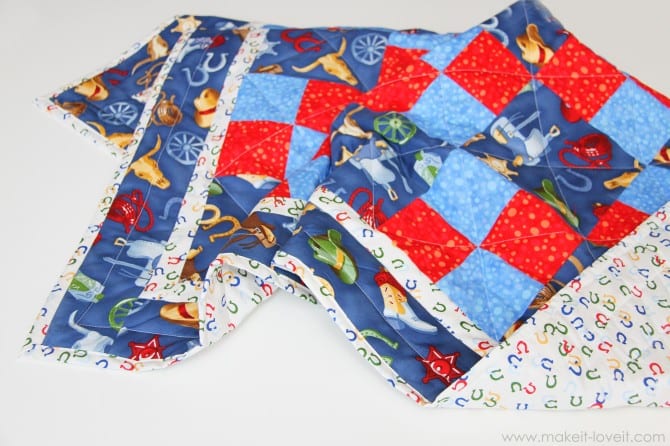
This summer I made my very first children's quilt for a great cause called Quilts for Kids.  You can request a Quilt Kit and they will send you almost everything you need to make a small quilt for an ill child.  The only thing you have to provide is the batting and the postage to mail the finished quilt back to the company for distribution.  
As a beginner I felt this was a great way to practice and serve others!  I loved working on that quilt and prayed over it as I was sewing for the child that would receive it.  
This is what the kit contains, everything is already cut for you....perfect for a beginner!!
You can find two great tutorials to make one of these quilt's at Ashley's blog, Make it & Love it .  She walks you through step by step!

and
How to Quilt and Bind 


This is a quilt that I made as a Christmas gift for my Niece.

I bought these Riley Blake "Happy Ever After" 5 inch pre-cut squares from the Fat Quarter Shop.
I picked up the white and yellow fabric from my local Joann's.


Thumbnail
My favorite quilting tutorials on You tube have been through Missouri Star Quilt Company.  They have a series of 4 videos that walk you through making a baby quilt using charm packs.  Charm packs are the packs of pre-cut squares that I showed you above.
Follow her step-by-step instructions to get started on a baby quilt yourself!
Fabric Selection and Assembly
Borders 
Preparing and Quilting 
Fabric Selection and Assembly

I made me Neice's quilt by following these videos and finished it by using Ashley's tutorials.
I may make another Quilt for the Kids program this year.  Won't you join me in blessing those kiddos?  Let me know if you plan to :)


Related Posts Plugin for WordPress, Blogger...