Showing posts with label sewing tutorial. Show all posts

Monday, May 13, 2013

DIY: Personalized Kitchen Towel Tutorial

Today I'm sharing a quick and easy sewing tutorial for personalized kitchen towels.  I made these last week as Mother's Day presents but couldn't tell you, otherwise I would have ruined the surprise for the special Mom's in my life.  I was really happy with how they turned out, so here is the tutorial.
  I bought these kitchen hand towels from Target.   I cut a cereal box apart to make a template for adding the fabric to the towel.  My towel was 3.5 inches wide by 16 inches long.  
Lay your template on top of the coordinating fabric and cut it so that you have about a half an inch difference on each side.  
Press your fabric up and around the template to make a nice square to be able to pin neatly to your towel.  
Pin onto your towel and you're ready to sew.
Make sure to stay close to the edges so that you catch the folded fabric underneath. 
It's as easy as that.  If you have an embroidery machine you can make them even more special by adding an initial.  They will make a great gift both with or without the added initial.  My Mom's loved them and I'm glad that they will think of me when they see them hanging in their kitchens.  
These towels would be a great gift for any occasion!  I also would love to add some color to my kitchen, so I think I'll go make a couple more for me.

Who could you make a set for?


Wednesday, January 9, 2013

Easy Baby Quilts for Beginners


This summer I made my very first children's quilt for a great cause called Quilts for Kids.  You can request a Quilt Kit and they will send you almost everything you need to make a small quilt for an ill child.  The only thing you have to provide is the batting and the postage to mail the finished quilt back to the company for distribution.  
As a beginner I felt this was a great way to practice and serve others!  I loved working on that quilt and prayed over it as I was sewing for the child that would receive it.  
This is what the kit contains, everything is already cut for you....perfect for a beginner!!
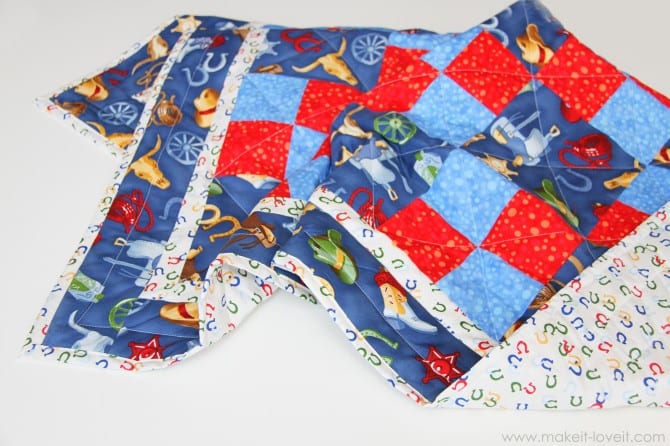
You can find two great tutorials to make one of these quilt's at Ashley's blog, Make it & Love it .  She walks you through step by step!

and
How to Quilt and Bind 


This is a quilt that I made as a Christmas gift for my Niece.

I bought these Riley Blake "Happy Ever After" 5 inch pre-cut squares from the Fat Quarter Shop.
I picked up the white and yellow fabric from my local Joann's.


Thumbnail
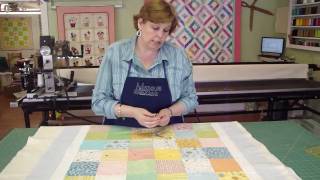
My favorite quilting tutorials on You tube have been through Missouri Star Quilt Company.  They have a series of 4 videos that walk you through making a baby quilt using charm packs.  Charm packs are the packs of pre-cut squares that I showed you above.
Follow her step-by-step instructions to get started on a baby quilt yourself!
Fabric Selection and Assembly
Borders 
Preparing and Quilting 
Fabric Selection and Assembly

I made me Neice's quilt by following these videos and finished it by using Ashley's tutorials.
I may make another Quilt for the Kids program this year.  Won't you join me in blessing those kiddos?  Let me know if you plan to :)


Thursday, December 13, 2012

Beautiful Burlap Bird Tutorial

 
Last week I shared "A Quiet Evening", a women's church event that I helped with.  I mentioned that I made 100 Burlap birds as favors for the ladies, and I'm back today with a tutorial on how I made those.  They fit so well with our theme of freedom and I just love the natural look of Burlap. 
 
 You'll need burlap, white duct cloth, Heavy Duty Wonder Under, my pattern and some ribbon.
Click HERE for the bird pattern.
 
Start by ironing on the Wonder Under to your peice of burlap.
The Wonder Under has a smooth side and a bumpy side.  Iron the smooth side down.
Trace the bird pattern onto the back of the Wonder Under after it has cooled.
Carefully cut around the bird shape. 
Carefully peal the back of the Wonder Under off the cut out bird, and lay it right side up on another peice of burlap.  Place your ribbon in between, like a sandwich.
Set your iron on high, mine was at linen.  Place a damp cloth over the bird sandwich you just made and press for 20 seconds.  Be very careful of the hot steam!
After it's cooled, carefully cut around the shape of the bird.
Iron on the Wonder Under onto the white duct cloth as I said earlier and trace the wing pattern onto it.  Cut out and peal the back of the Wonder Under off the wing and iron it onto the bird body the same way as mentioned before.
Stitch around the wing and the body of the bird to complete your Beautiful Burlap Bird.
I think the Heavy Duty Wonder Under would keep the burlap from fraying but I think it adds just the right touch by sewing around your bird.  That way if it does start to fray, it will only fray around the edges leaving a rustic look.
We wrote the scripture that went along with our message, Isaiah 6:1, in Gold Sharpie.  You could write anything you like on it or leave it blank.  These would make beautiful ornaments, a great party or wedding favor.  I hope you will comment with any questions, I would be glad to help!


 linking to:


Tuesday, November 13, 2012

Easy Appliqued Turkey Shirt

Today I made these cute Thanksgiving Turkey Shirts for Little Sis and my Neice.  {You know cause you can't make a gift for the Nephew and leave out the Neice}  I think they turned out pretty cute, can't wait to see the girls wear them, I'll be sure to post a pic when they do.
 
I printed the turkey and feather pattern from The Cottage Home.
If you don't know how to make an appliqued shirt, check out my tutorial for a pumpkin shirt I made last month, it's pretty easy and fun.


Monday, November 12, 2012

Easy Tube Pillowcase Tutorial

Today I'm linking up to Dare to do it yourself @
Grab My Button

Today I'm sharing how I've learned to sew pillow cases.
This is a great project for a beginner sewer, it's all straight lines and very basic.
(I asked for a sewing machine for Christmas two years ago and I've taught myself to sew using You Tube and all the great tutorials online.  I am not an expert!  If I can do this you can too :)
This pillowcase is for my nephew's birthday.  He will be going into a big boy bed soon and these will go great with all the airplane decor in his bedroom.  

For one pillowcase you will need:
27 inches of fabric for the body of the pillow
and 9 inches for the cuff
(Double this if you are making a pair of cases)
Tropicals and Converstaionals Fighter Plane Black from
Fabric.com
Kona Cotton Iron Gray from Fabric.com

Iron the 9 inch cuff fabric in half
Lay it face up on the floor or a large table
Take the body fabric (airplane) and carefully line it up with the top of the cuff fabric.
Roll up the bottom of the body fabric until it is in the middle of the cuff piece as shown above

You are going to line up the bottom of the cuff piece to the top where the two pieces are already line up.  You want to make sure it is straight and even before you start to pin.
Pin all three pieces together
(top of cuff, body and bottom of cuff)
The body piece will remain rolled up inside of this
Sew all the way down from the top to the bottom, backstitching at the top and bottom.
This is what the "tube" will look like once it is sewn

Pull the main fabric out from the inisde of the tube, pulling it inside right. 
All of your stitching will then become inside and the seams will not show
Now take your fabric and turn it inside out and pin together making sure to line up where the two cuff pieces will be touching. 

Sew around the whole pillow starting at the top of the cuff, backstitching both at the beginning and end of the pillowcase.
Clip your corners before turning it inisde right to make for neater corners. 
And there you have a cute pillowcase for a happy airplane loving little boy!!
 {Now I just need to get this to the post office to mail them off.}

I hope this tutorial made sense, let me know if you have any questions!!

Handmade Holiday Gift Idea Swap 


Friday, October 26, 2012

Easy Appliqued Pumpkin Shirt

Today I'm sharing my first ever appliqued shirt. 
My friend Whitney over at Diary of a Preppy Mom, our hubbies were in flight school together, recently shared a tutorial and free pattern for this cute pumpkin shirt so I gave it a try and I think it turned out pretty cute for my first try. 
 
I recently bought a white t-shirt off the clearance rack at Target for $1.50.
It had a heart pocket on the front but I used my seem ripper to remove it. 
I had some "Wonder Under" on hand.  You simply iron the bumpy side of the wonder under  onto the back side of your fabric.  Trace your pattern onto the paper side and cut it out. 
My pumpkin and stem using Whitney's pattern
After you cut out your pieces, you carefully remove the backing of the Wonder Under and then your ready to iron it onto the fabric.
All ironed on and sewn around the pattern. 
I've never done the zig zag stitch, I'm a little intimidated by it.
I need to just go for it and try it on a scrap of fabric but for now I'm happy with how the straight stitch looks. 
 Our church has a small pumpkin patch so we took a few pics that past Sunday.  Daddy was on duty so he missed out on being in the pics, will hopefully try again when he can come with us.  Such is the military life :-)
My Girls and I at the pumpkin patch

 
 Little Sis had fun checking out the big pumpkins there.
 

They even had some photo props set up for us.
I couldn't resist, I thought it was a precious background for the fall.
Check out my friends great blog over at:
Preppy Mom

See where I link up here.


Related Posts Plugin for WordPress, Blogger...